


Description
Everyone has seen those beautiful images of the Solar-Powered Butterfly Garden. It is a captivating sight, and one we hope you have seen. If not, now is the time to appreciate it! Butterfly gardens are gaining popularity as a result of their ability to attract a variety of butterflies. They also provide an opportunity for us to grow plants indoors in an organic way. It’s no wonder that solar butterfly garden lights are so popular right now! They will help you set up your own indoor butterfly sanctuary at home, complete with glowing flowers, colorful insects and birds singing outside your window. Here are some tips on how to use solar butterfly garden lights effectively.


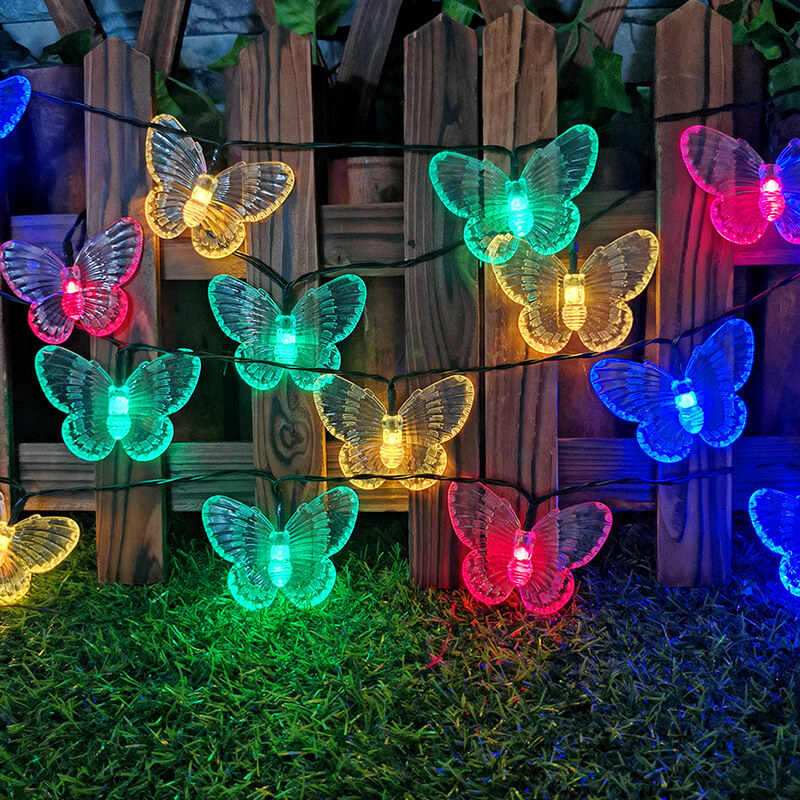
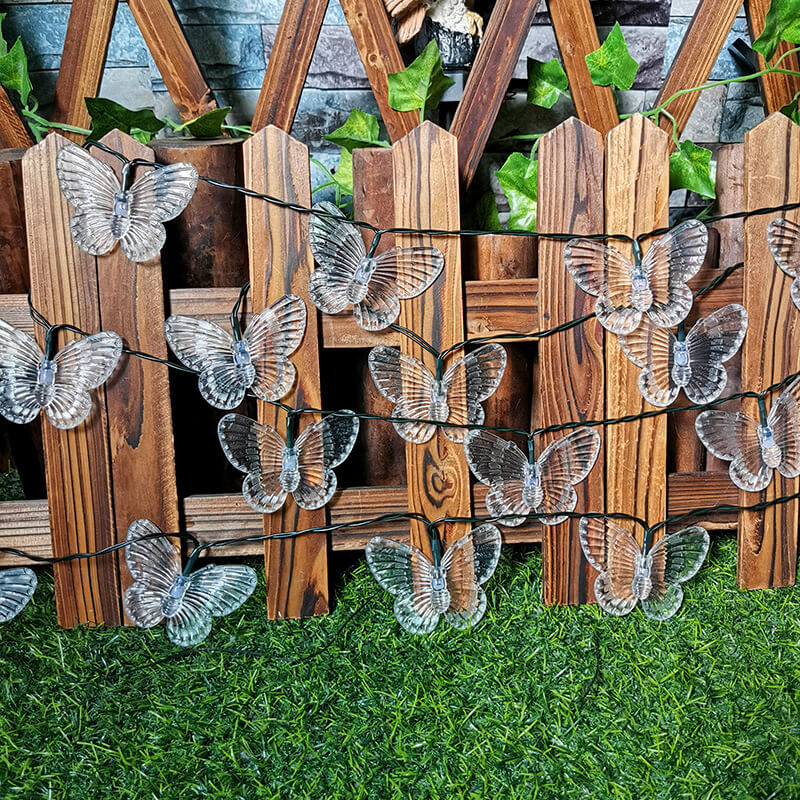
What are solar butterfly garden lights?
Butterfly lights are a great way to get to know your indoor garden and its plants better. These lights also add something special to an indoor garden, making it less dull. They are usually equipped with solar panels that charge batteries during daylight hours, giving off a pretty glow at night when no other light sources are available. This means that you don’t have to worry about electricity bills or replacing batteries. A great option for people who don’t have a lot of space or who don’t want to use a lot of money in decorating their home, butterfly lights are also easy to set up and maintain. They are also great for a combination of both indoor and outdoor spaces, adding a splash of color to your home.
How to Set Up a Butterfly Garden with Solar Butterfly Garden Lights
The first step to setting up a butterfly garden with solar lights is to gather the necessary materials. This includes:
– A large pot that can hold at least 6 inches of water or soil.
– A set of colorful flowers, preferably with long stalks. You can also try indoor flowering plants such as lilies, orchids and roses.
– A window with a southern exposure for the best sunlight exposure.
– A sunny wall for your butterfly garden, ideally with a south-facing window.
– A solar panel for charging your butterfly garden lights. – The solar butterfly lights you want to install.
– A power socket to plug your lights into.
Step 1: Pick a Pot for Your Garden
While you can grow your flowers in a pot on a tabletop, growing them in a pot inside a larger pot is recommended. The reason for this is that it will allow you to control the amount of sunlight your flowers receive. You do not want them to get too much or too little sunlight. Too much and they get too much water and too little and they die. There are a variety of pots you can choose from. The best option is to have a pot that has drainage holes; this will prevent the pot from becoming too soggy. You can also try to use a pot made of clay, or one that has a plastic liner to prevent soggy soil. Find a pot with a depth of at least 6 inches. This will ensure that the roots of your flowers are able to grow properly, and that there is enough room for the flowers to grow tall.
Step 2: Pick a Flower Pot for Your Garden
Now that you have a pot for your garden, it’s time to pick a flower for your butterfly garden. There are several beautiful flowers that work well for this purpose, including: – Orchids – These are one of the most popular indoor plants for both indoor and outdoor gardens. Although they are often expensive, they are also very easy to grow and maintain. They come in a variety of colors, making them ideal for decorating a home. – Lilies – Some people consider lilies to be the absolute best flowers to grow in a butterfly garden. They have soft, velvety petals that are of the right color for a butterfly garden. You can also grow irises, orchids, tulips and many other plants that work well in a butterfly garden. – Roses – Roses are beautiful flowers that also work well in a butterfly garden. Their long and robust stems are perfect for climbing. You can also grow many other types of roses, such as hybrid roses and miniature roses. – Gerbera Daisies – These flowers are hardy and can grow in a variety of conditions. They are also easy to care for and come in a variety of colors.
Step 3: Water Your Flowers
Now that your flowers are planted in the pot, it’s time to water them. This prevents your flower pot from becoming too dry, soggy and potentially breaking. Fill the pot with enough water so that the pot is about an inch below the rim of the pot. You should water your flowers every day so that they don’t become too thirsty and die. You can also use a plant saucer to make sure that your flowers don’t get too wet. Next, place your flower pot on the window sill so that it receives plenty of sunlight. You can also place your pot on the sunny wall if you have one available. You should place your pot in such a way that it receives the maximum amount of sunlight. This will ensure that your pot is always in the shade, and not exposed to the direct sunlight.

Step 4: Install a Solar Panel on Your Window Sill
Next, you need to install a solar panel on your window sill. You can do this by installing a solar panel on your window sill and connecting it to a solar panel for your butterfly lights. The best place to put the solar panel is on the southern wall or southern window. This is because the panel will receive the minimum amount of direct sunlight. It is best to install the panel on the southern wall because it will get the most sunlight. This will make sure that your flowers receive the least amount of sunlight.

Step 5: Charge Your Batteries with Enough Sunlight
When your solar panel is installed, you need to charge your butterfly lights batteries. This will allow them to glow, and will also reduce the amount of power that you use. You need to charge your butterfly lights batteries so that they are charged enough to emit a bright glow when no electricity is available. You can charge your batteries with enough sunlight, or with a small solar panel connected to the panel. If you are using the batteries, you need to make sure that they are charged enough so that they emit a bright glow, even when there is no electricity. This will make sure that your butterfly lights don’t die when there is no electricity, and that they continue to shine even when there is no electricity.

Step 6: Install Your Butterfly Garden Lights
Now that everything is set up and charging, you can plug your solar butterfly garden lights into the socket. You can use a plug in power strip to ensure that there is enough power for all your devices. The last step is to plant your flowers in your butterfly garden. This is the most important part, as it will allow your flowers to grow properly. Place each flower in their respective holes, and water them regularly. You can also feed your flowers once a day with a liquid fertilizer. You can also try adding a little bit of iron to the mixture. This will help your flowers to grow stronger and faster.

Final Thoughts
Now that you know how to set up a butterfly garden with solar lights, you can enjoy the benefits of this type of garden. These lights are an ideal way to decorate your home, especially if you don’t have a lot of sunlight coming in through your windows. You can enjoy the beautiful glow of these lights even when the power is out.


Reviews
There are no reviews yet.